
A veneered bathroom in Żoliborz
- Location
- Żoliborz, Warsaw
- Materials
- natural wood veneer, handleless opening, integrated LED lighting
- Timescale
- 5 weeks
Workshop in Piaseczno
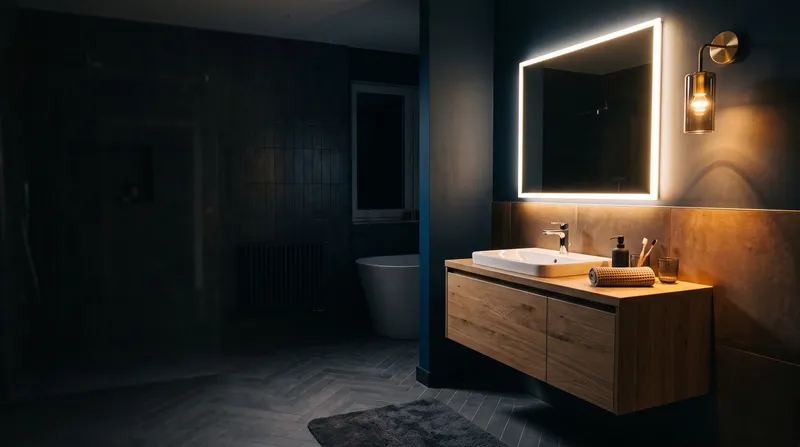
A vanity unit, a tall cabinet or panelling by the bath: we choose materials that cope with moisture and plan access to the valves before production starts.
Who it's for
A bathroom sets one hard condition the rest of the house doesn't: the material has to cope with moisture, splashes and changing temperature, not just look good in a visualisation. On top of that there's access for servicing the trap and valves, easy to forget at the design stage and hard to fix once the wall is boarded in.
Boards, edging and seals are chosen to stand right next to a basin or a shower.
The gap under a wall-hung cabinet lets you mop the floor without moving furniture, and keeps the base away from water running across the floor.
We mark access panels for the trap and valves on the design from the outset, so a plumber's visit doesn't mean taking the whole cabinet apart.
Scope

With a worktop integrated with the basin or a separate one, drawers sized around the trap, which usually eats into part of the depth.

A shallow unit above the basin for toiletries and medicines, sometimes with LED lighting along the edge of the mirror.

A column unit for towels and spare toiletries, narrow if the bathroom is tight on space, deeper if there's room to spare.

A panel hiding the pipework by the bath, or a recessed shelf in the shower enclosure, in a material built for constant contact with water.

Access panels at the trap, isolation valves and the washing machine connection, hidden in the front but openable without tools.

A gap at the bottom of the front and behind the carcass, so damp air doesn't sit inside the cabinet after a shower.
Styles

A lacquer built to handle splashes and steam, easy to wipe down, with no porous surface for moisture to sit in.

The look of wood without its sensitivity to moisture. Next to a bath or shower, well-sealed edges matter just as much.

Flat fronts you pull open by a groove along the edge, with no handles for water and limescale to collect on.

A dark vanity unit with a light worktop, or the other way round, tied together by hardware in one finish throughout.
Materials and hardware
Coping with moisture matters more here than anywhere else in the house, so we choose materials together with edge sealing and hardware that won't corrode. You'll find the full picture in the materials library.

Fronts
A velvety, non-reflective front sprayed onto MDF, in any colour from the RAL or NCS charts.

Fronts
A deep matt, soft-touch surface on board that doesn't hold greasy fingerprints.

Worktops
Minerals pressed and fired at very high temperature, with no resin, so hot pans and sunlight don't harm it.

Interiors, fittings and handles
Plain fronts with no handles, opened by a recessed profile, a routed edge or a light push.

Interiors, fittings and handles
LED strips in aluminium profiles under wall units, in shelves and inside wardrobes, planned along with the furniture.
Process
Cabinet design has to line up with the plumbing layout, so it's best to start once the water and drainage points are fixed, usually after you've settled things with a plumber or at the tiling stage. We mark access panels and ventilation gaps on the drawing before ordering the boards, rather than cutting them in as an afterthought during fitting.
Every stage of a projectProjects
Questions
Boards with proper edge sealing, moisture-resistant lacquers and veneer treated for bathroom use all hold up well. We avoid materials with unsealed edges, since that's where water gets in fastest.
Wall-hung leaves a gap under the unit, so it's easier to mop underneath and less water collects at the base. Floor-standing can be handy when you want extra storage right down at floor level.
We leave an access panel or a removable section in the design exactly where the trap and isolation valves are, so a plumber doesn't need to take the whole cabinet apart for a small repair.
Yes, as long as the milled edge or opening mechanism is well shielded. High-gloss fronts close to a basin are the harder ones to keep looking clean, since every water droplet shows.
We leave a gap at the bottom of the front and behind the carcass, so damp air can escape instead of sitting against the wall after every shower.
Quote
Use the online quote wizard to tell us what stage the bathroom work is at and where the plumbing already runs. If you'd rather talk it through, book a consultation.